


Introduduction
Every organization must consider the importance of documentation. Without documentation, it will be difficult for organizations, developers, and other entities, whether in the technology or non-technology industries, to keep track of information.
Building a documentation site can be difficult, especially when you do not have basic knowledge of front-end languages like HTML, CSS, and Javascript.
However, you do not need to have complete knowledge of these technologies to build a documentation site with Docsify.
In this article, you will learn how to build a simple documentation site with Docsify and deploy it to GitHub pages.
Definition of Terms
Docsify: A static site generator tool
HTML: HyperText Markup Language
GitHub pages: Allows you to host your websites directly from Github repositories
CSS: Cascading Style Sheet
Javascript: Programming language that allows websites to be interactive.
SSG: Static Site Generator
SSR: Server Side Programming
CLI: Command Line Interface
URL: Uniform Resource Locator
What is a Documentation site?
A documentation site is a site that contains information about a product, library, technology, programming language, framework, etc. Think of it as a library where users get information on using a product or framework.
Use case
Documentation sites are used to build documentation for programming languages, APIs, libraries, software versions, software development kits, etc.
Organizations and industries also use them to document information about their products, which may include technical specifications, release versions, statements of work for projects, user guides, etc.
Prerequisite
Have a GitHub account
Know GitHub
Have a code editor such as Visual Studio code installed on your PC
Install node js
Getting Started with Docsify
Docsify is a static site generator with zero configuration. It is easy to use; you do not need to know Javascript, HTML, or CSS. Docsify can be deployed on various platforms like GitHub pages, GitLab, or VPS.
Docsify comes with distinctive features, such as
Multiple themes
Emoji support
Compatible with IE11
Plugin API support
No statically built HTML files
Supports server-side programming (SSR)
Lightweight
Installation
Before installing Docsify, ensure you have nodejs and npm installed on your PC
- Create a repository on GitHub and copy the link

Go to your File Explorer, create a Folder, and give it your preferred name
%20(1).png?raw=true)
Go to your Visual Studio code and click on Clone Repository
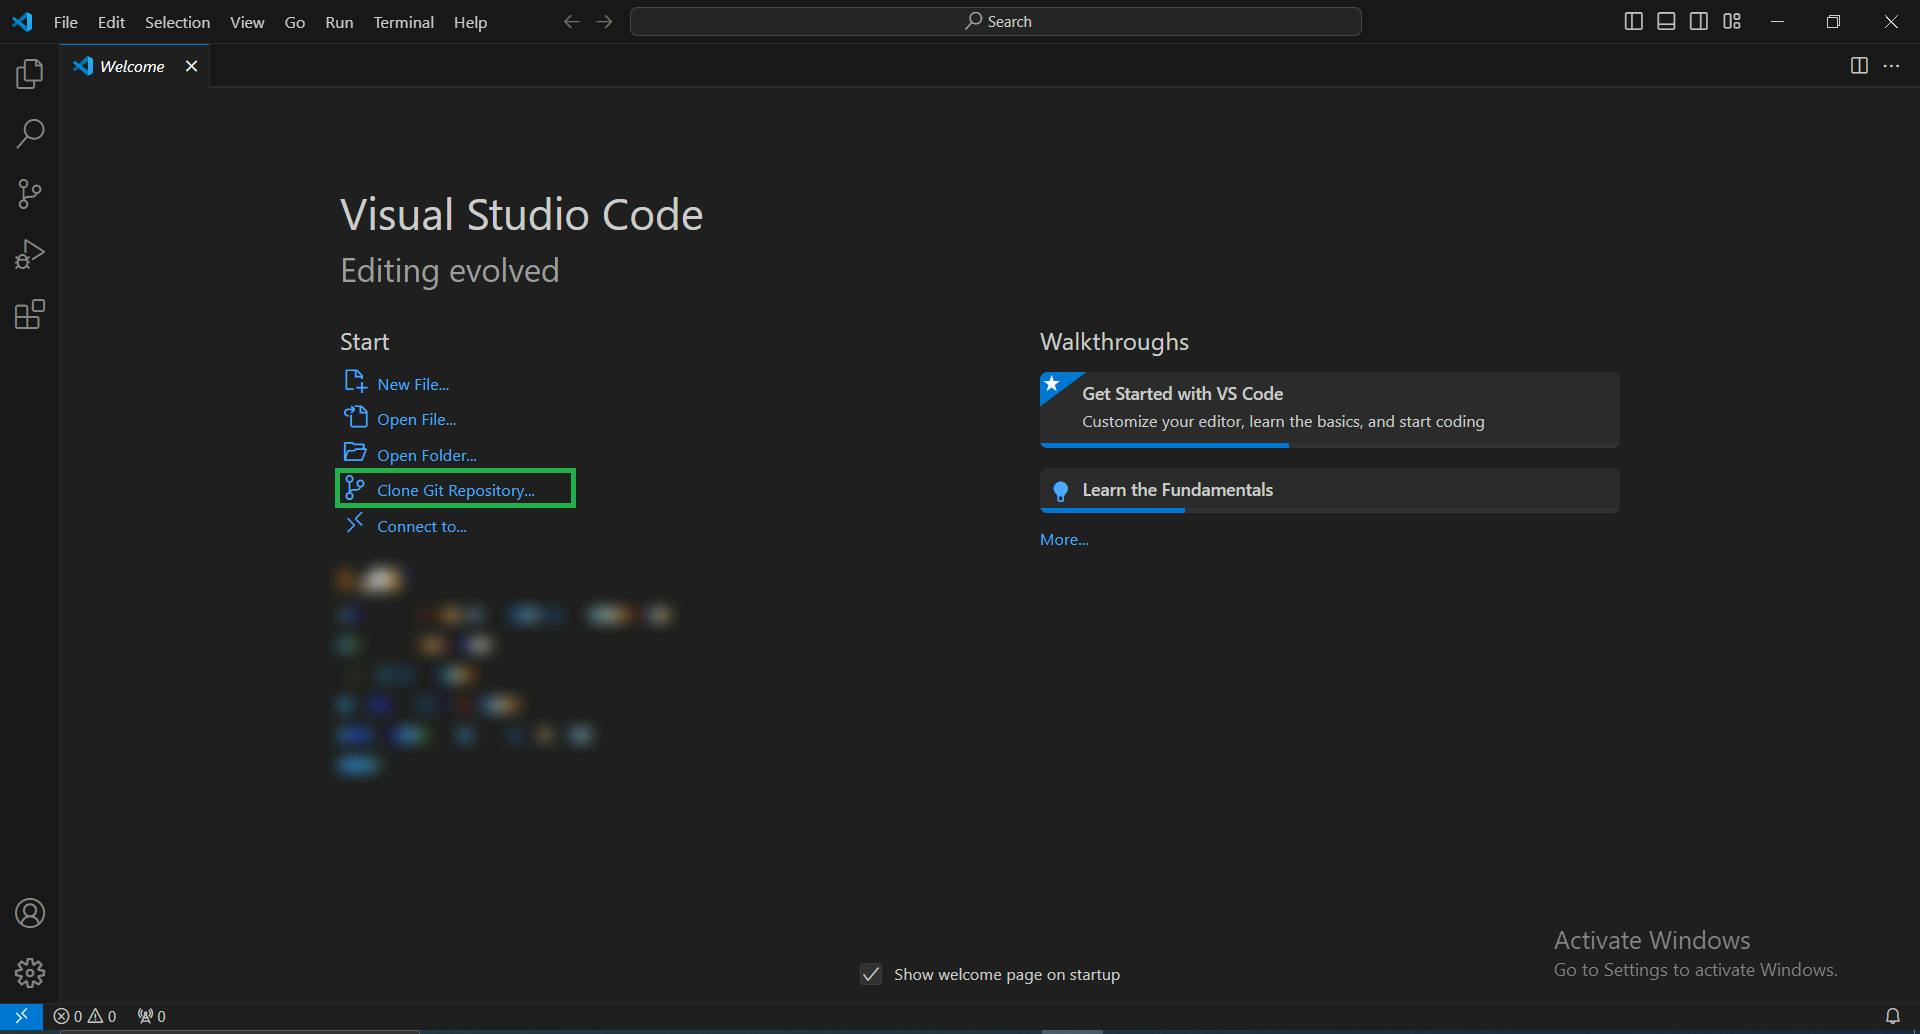
Enter the URL of the repository created on GitHub.

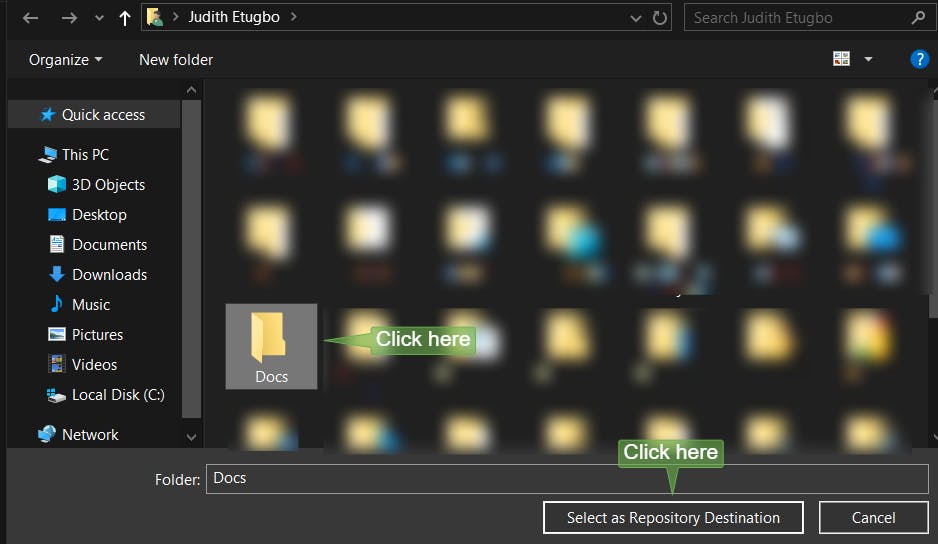
Select the Folder where you want to clone your repository and click Clone.
Go to your terminal and install Docsify Command Line Interface (CLI).
npm i docsify cli -gCheck the image for output.
.png?raw=true)
Create your project using the command below.
docsify init docs.png?raw=true)
Three files will be generated after this initialization. Locate the files inside your docs folder.
Index.html- This serves as the entry file
.nojekyll - This prevents GitHub pages from ignoring files that begin with an underscore
README.md - This serves as a homepage for your site
Preview your website using the command below
docsify serve docsOutput of the command
.png?raw=true)
Ctrl+click on localhost:3000 your website will display
.png?raw=true)
Stage, commit, and push your files to your remote repository using the following command
git add . to add all untracked and changed files
git commit -m "your commit message"
git push
Customizing your Documentation with Docsify
As mentioned, Docsify has many beautiful features that allow you to customize your documentation site. In this section, I will explain some basic customization.
For advanced customization, see Docsify documentation.
Configuration: This allows you to configure basic information such as logo, name, repository link, theme color, etc. To do this, define
windows.$docsifyas an object. Define the object in the /docs/index.html.<script> window.$docsify = { name: 'Doc as code', repo: 'https://github.com/Nickyshe/Doc-as-code.git', themeColor: '#3F51B5' } </script><script>:This tag marks the beginning of a JavaScript code block within the HTML document.windows.$docsify:This line defines a JavaScript object named$docsifyand assigns it as a property of the global window object. This makes the$docsifyobject accessible throughout the webpage.name:Website name that will appear on your browser or window title.repo:Your Git repository URL.themeColor:This sets the primary theme color for the documentation website.You can add more key values to your script.
Sidebar: The sidebar displays the table of contents for your documentation. Enable the sidebar by adding this code to your
< script>block.<script> window.$docsify = { loadSidebar: true, <!-- Enable sidebar --> }; </script>Once this is done, create a _sidebar.md file in your docs folder to add your table of contents.
✅README.md file serves as the default home page.In the _sidebar.md file, add other pages using the following markdown syntax.
  - [Home](README.md)
  - [Quick Start](Quick_Start.md)
  - [Customization](Customization.md)
  - [Guide](Guide.md)
Run
docsify serve docsto preview your website.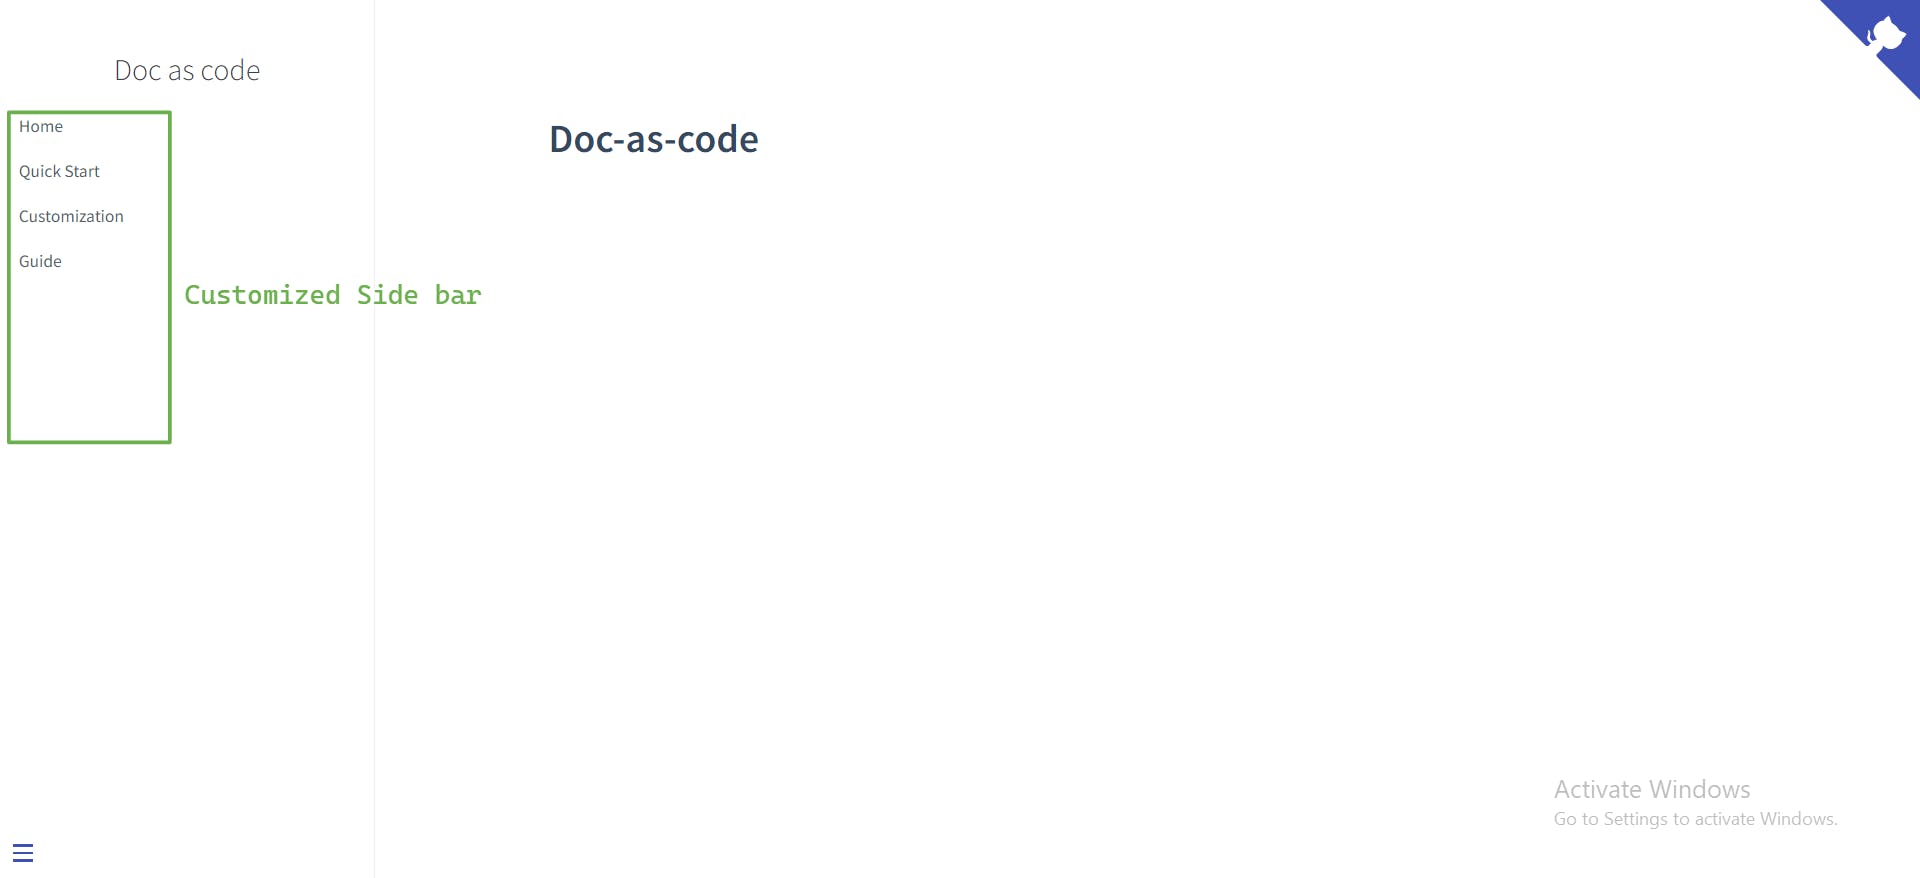
Themes: Docsify provides a variety of themes; they are official and community-made.
  <!--vue theme -->

  <link rel="stylesheet" href="//cdn.jsdelivr.net/npm/docsify/themes/vue.css" />

  <!-- buble theme -->

  <link rel="stylesheet" href="//cdn.jsdelivr.net/npm/docsify/themes/buble.css" />

  <!-- dark theme -->

  <link rel="stylesheet" href="//cdn.jsdelivr.net/npm/docsify/themes/dark.css" />

  <!-- pure theme -->

  <link rel="stylesheet" href="//cdn.jsdelivr.net/npm/docsify/themes/pure.css" />
Copy any theme of your choice and paste it inside the head element in your index.html file.
For example, add this theme to your HTML file
<link rel="stylesheet" href="//cdn.jsdelivr.net/npm/docsify/themes/dark.css" />inside the<Head>element.Check the image for output.

To access other themes, see docsify-themeable
Navbar: To display a nav bar, you have to enable your navbar by adding the following code to your
<script>block<script> window.$docsify = { loadNavbar: true, <!-- enable navbar --> }; </script>Then, create a file _navbar.md in the docs folder. Add the following code to the file _navbar.md.
  - Getting started
    - [Quick start](quickstart.md)
    - [Writing more pages](more-pages.md)
    - [Custom navbar](custom-navbar.md)
    - [Cover page](cover.md)
  - Configuration
    - [Configuration](configuration.md)
    - [Themes](themes.md)
    - [Using plugins](plugins.md)
    - [Markdown configuration](markdown.md)
    - [Language highlight](language-highlight.md)
Preview your website

Cover page: This page will display when your site launches. To display the coverpage enable it by adding the following code to your script block.
  <script>

  window.$docsify = {

  coverpage: true, <!-- enable coverpage -->

  };

  </script>
Then, create a _ coverpage.md file in the docs folder. Add your cover page using the following markdown syntax.
  # Learn Docsify

  ### Learn docsify start from beginner.

  [Start](learn)

  [Github](your github repo link)
Check the image for output.
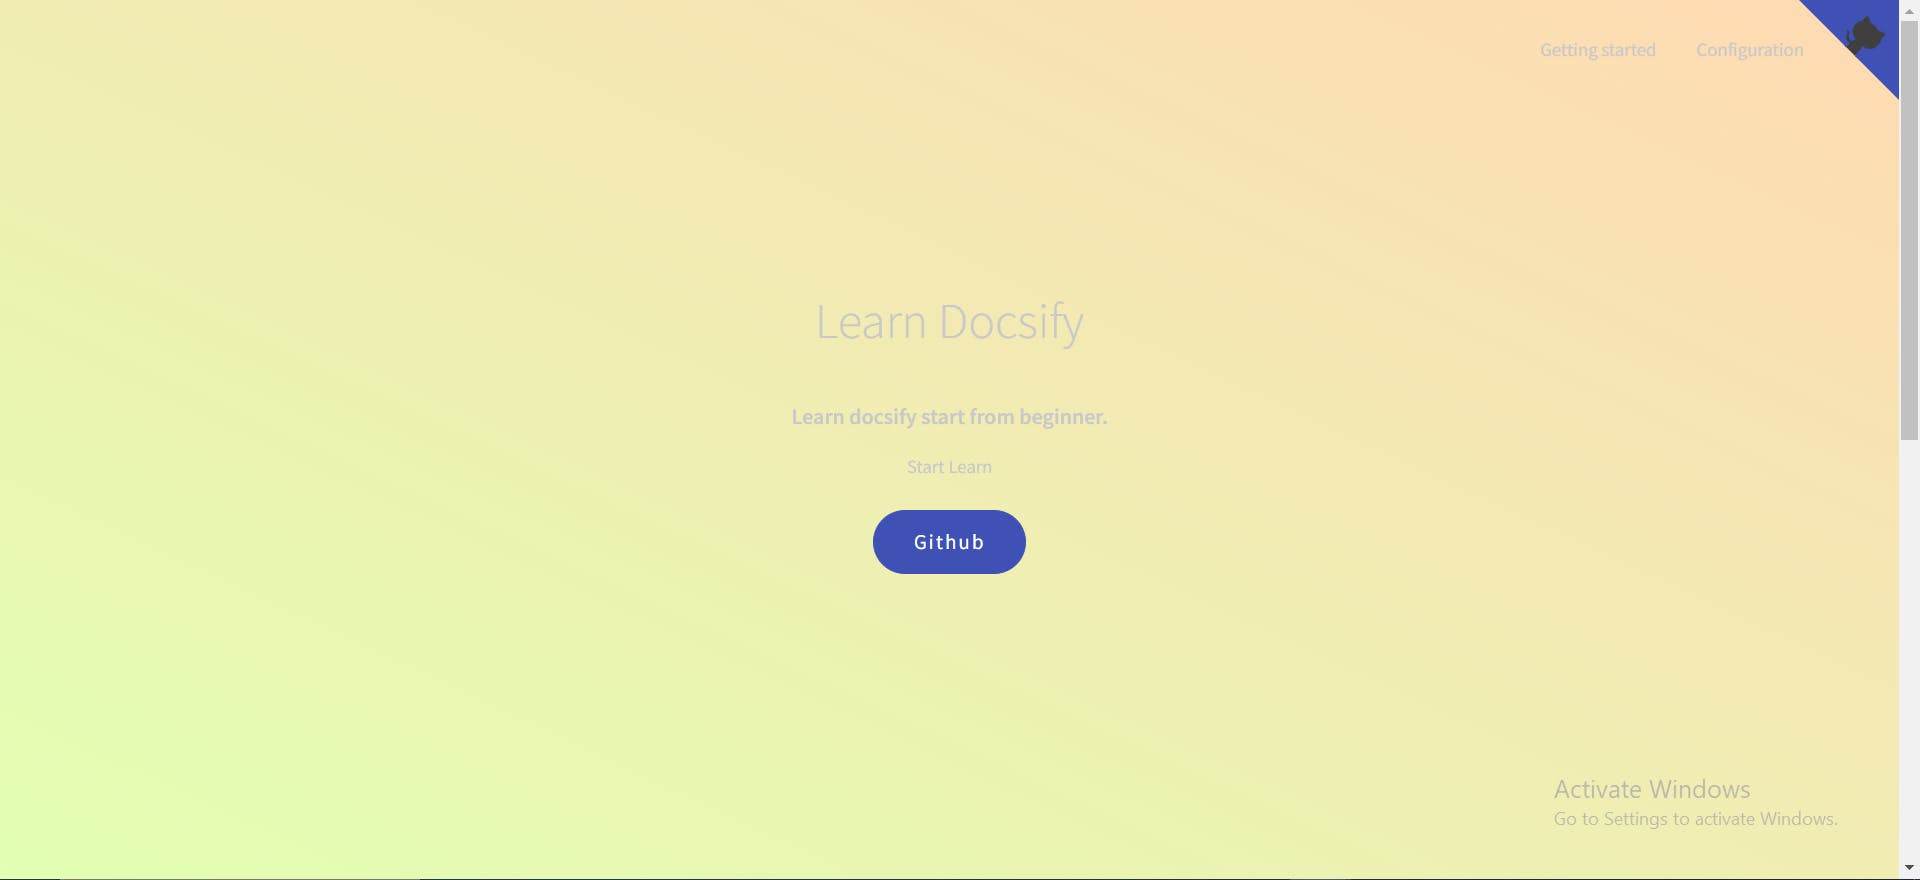
The [start](learn) will direct you to the homepage.
The [GitHub]( ) will direct you to your GitHub repository.
Note: The user interface(UI) and cover page depend on your chosen theme.
Deploying your site with GitHub Pages
This section explains the steps in deploying your site with GitHub pages.
Step 1: Go to your repository and click on Settings
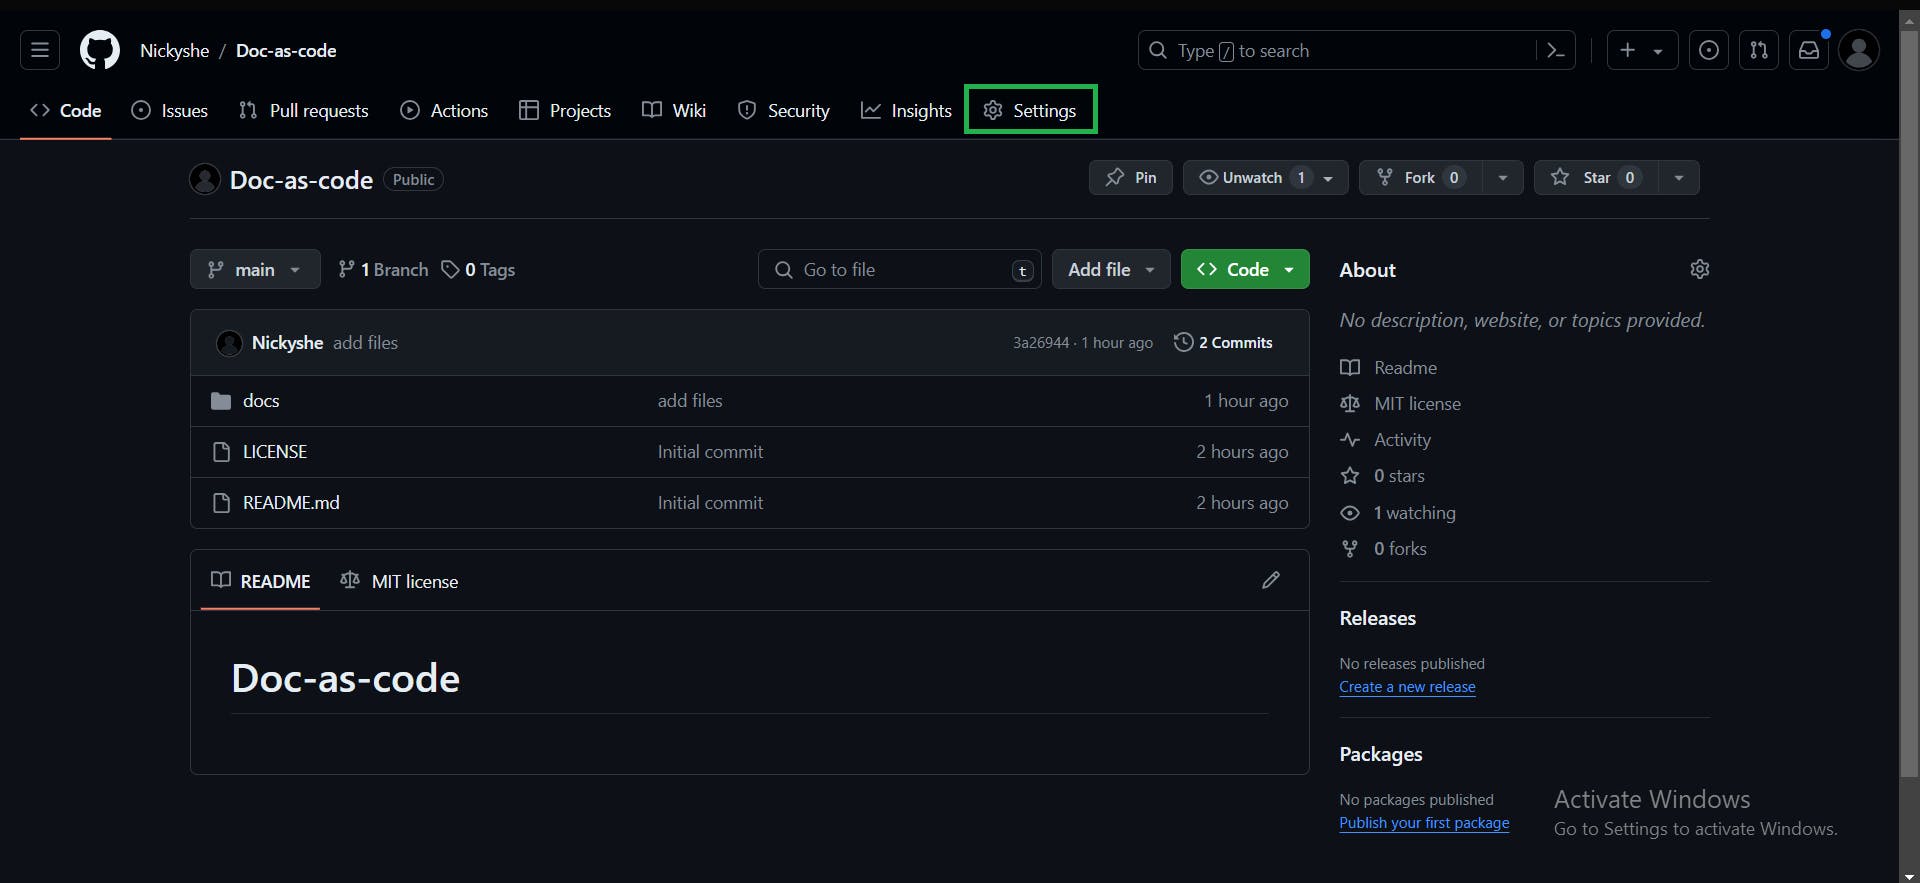
Step 2: Select Pages
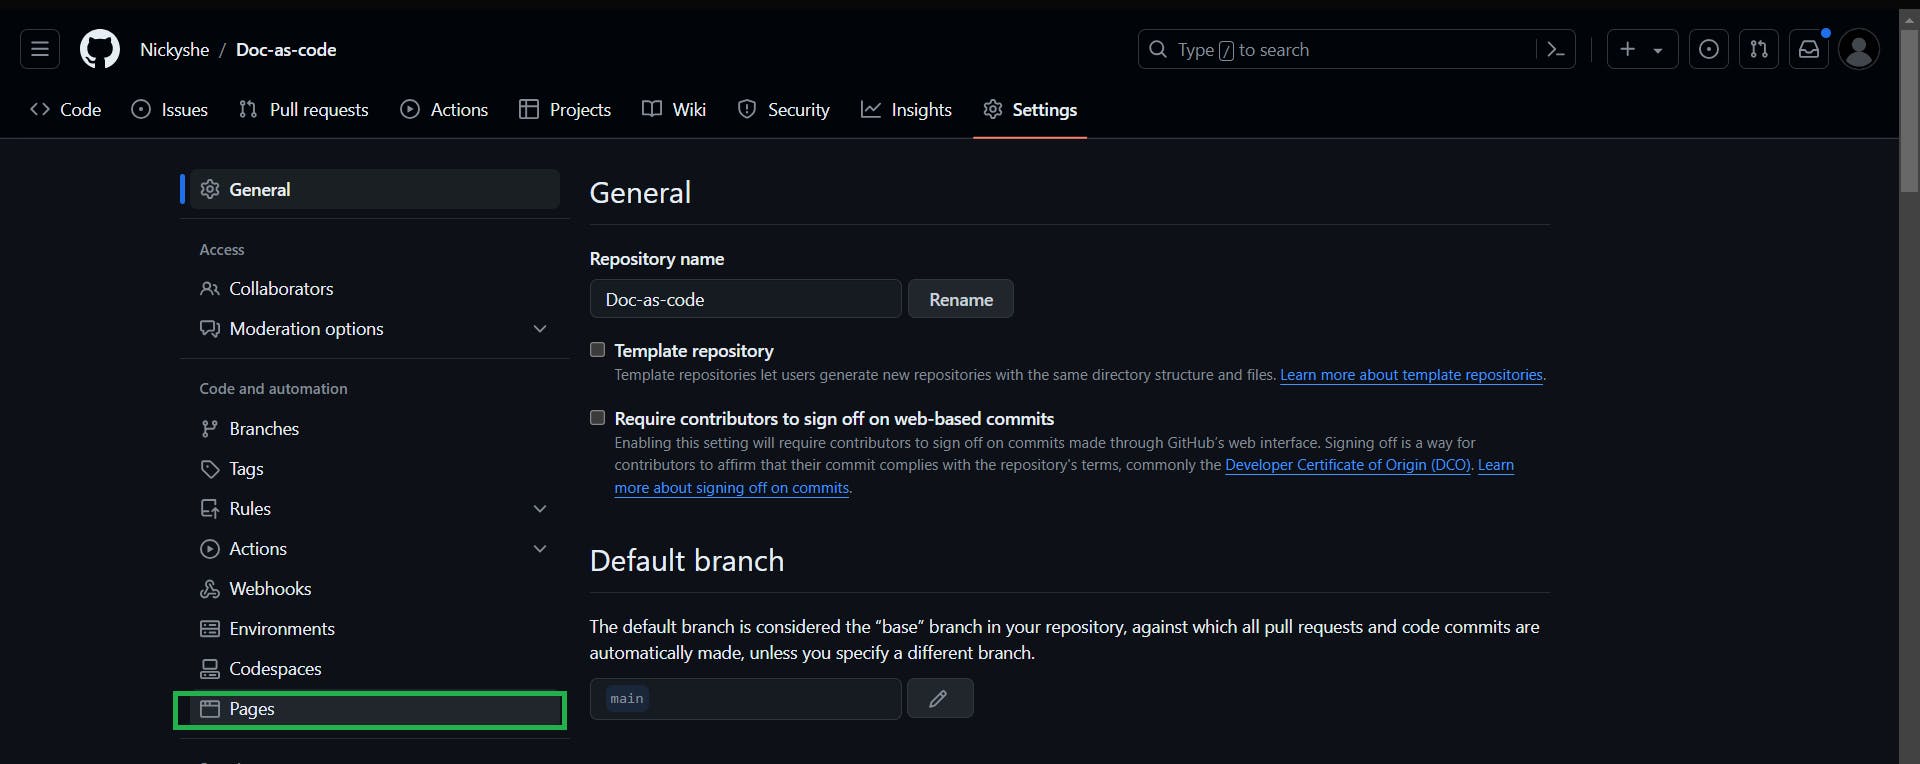
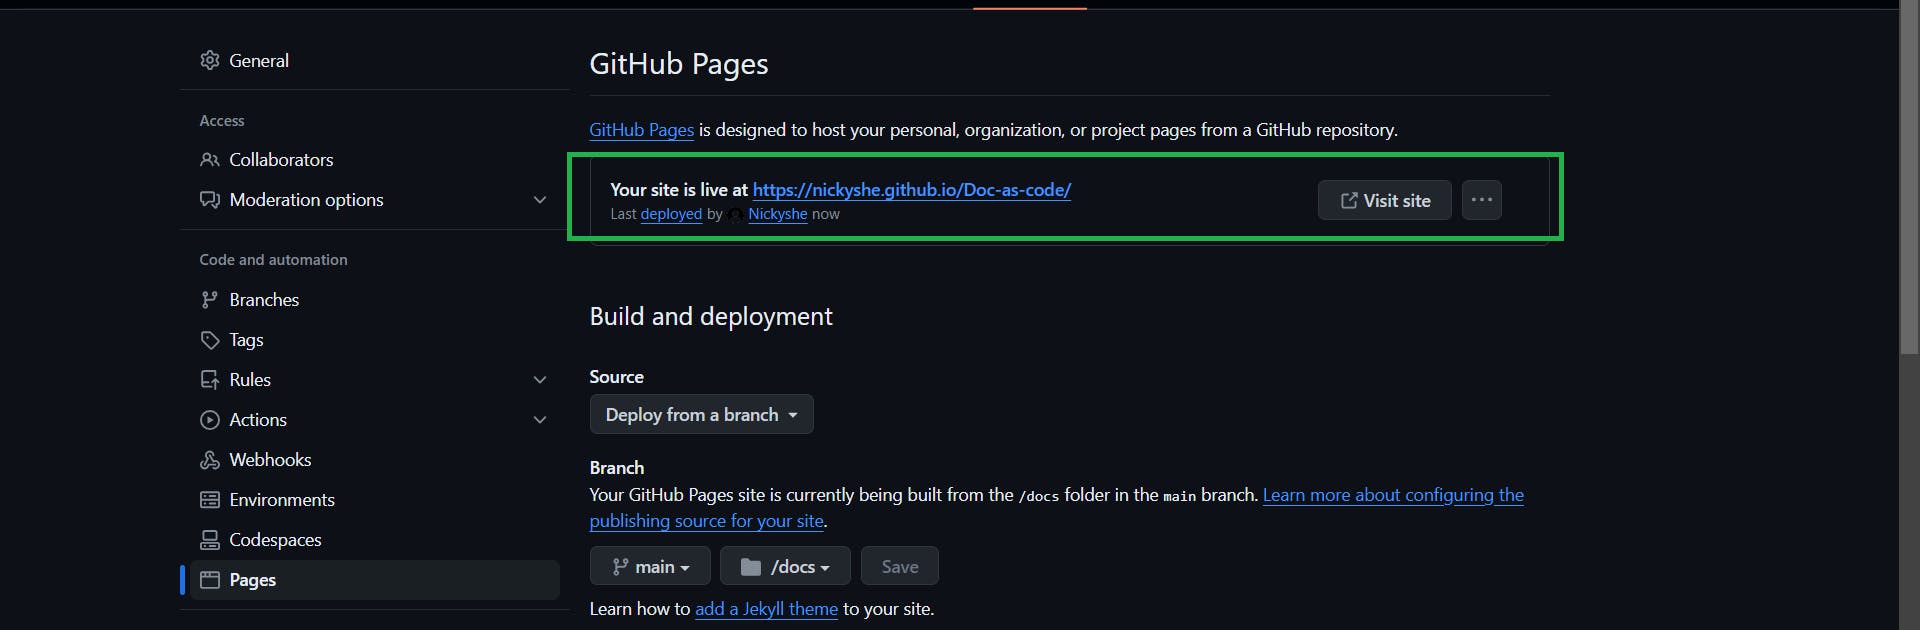
Step 3: Scroll to Source and select Deploy from a branch.

Step 4: Select your Branch (main) > docs > and click on the Save button

Step 5: Push your changes and allow them to deploy; this will take some time. After deployment, you will see your production URL
Conclusion
Docsify is an excellent tool for technical writers unfamiliar with Frontend languages. By following these steps, you can build a simple documentation site.